
One of the ways in which I’m preparing for a future model railroad is by practicing weathering techniques, which is an aspect of modeling that I had always admired but never attempted. Over the past couple of years, I’ve purchased several low-price, old models to practice on. They’re copies of some of the models made in the 1970s that my dad had when I first became interested in model railroads. Depending on how they turn out, I might end up using some of them on a future layout, but since they’re models of locomotives built at from around 1915 through the late 60s, and my next layout will certainly model some time from the mid-30s to mid-40s, I certainly won’t use all of them. At the very least, the steam engines might be useful just sitting on the track somewhere as scenery, to help fill out a yard or engine house until I have enough higher-quality models to replace them with. Most importantly, they’re cheap models to practice on.
Practice Models:
- Life-Like B&O Pacfic
- AHM Norfolk & Western GP-18
- AHM Santa Fe GP-18
- AHM Pennsylvania C-Liner
- Athearn Burlington Northern SD-9
- Model Power Shifter with Smoke
- Mantua B&O Pacific(s)
The first model I got started on was the Model Power Shifter, which I had previously upgraded with a working smoke unit like the one that came built-in on my dad’s old model. I removed all of the model’s lettering using 91% isopropyl alcohol and a tooth brush. The engine didn’t appear to have any paint on it (just black plastic), but the tender had something sprayed onto it slightly unevenly. Perhaps it was just something to protect the lettering, or to help it stick to the plastic, but I took it all off with the isopropyl alcohol. I then rinsed and dried the model, and put it back in its box, unassembled, until I was ready to paint.
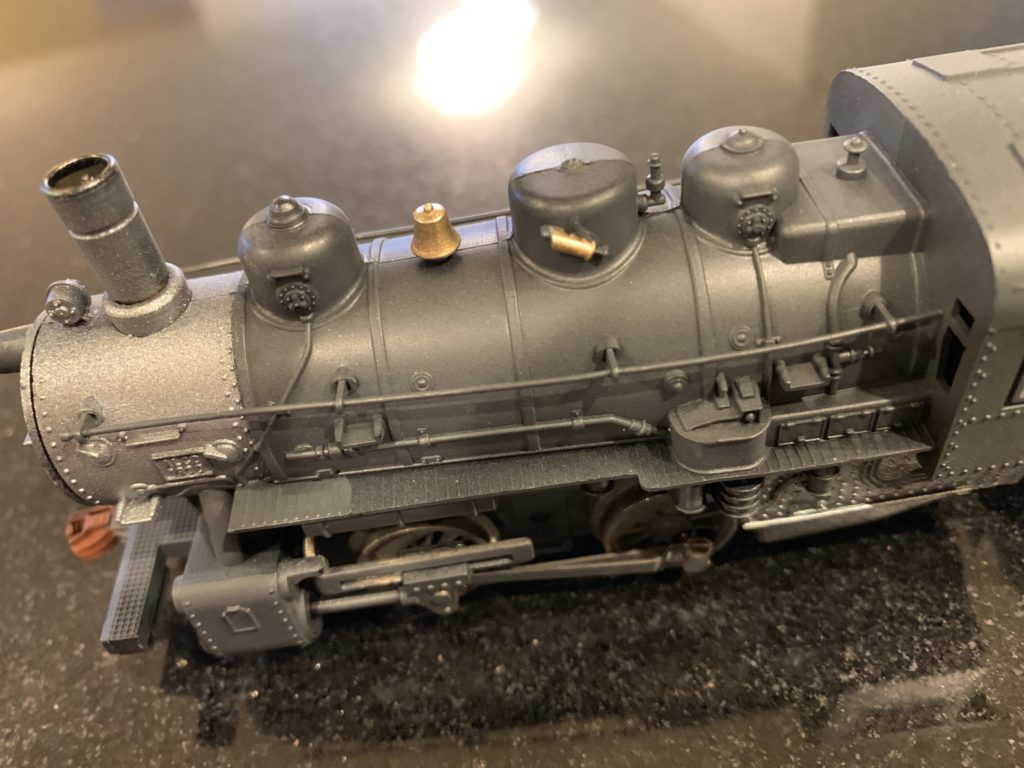
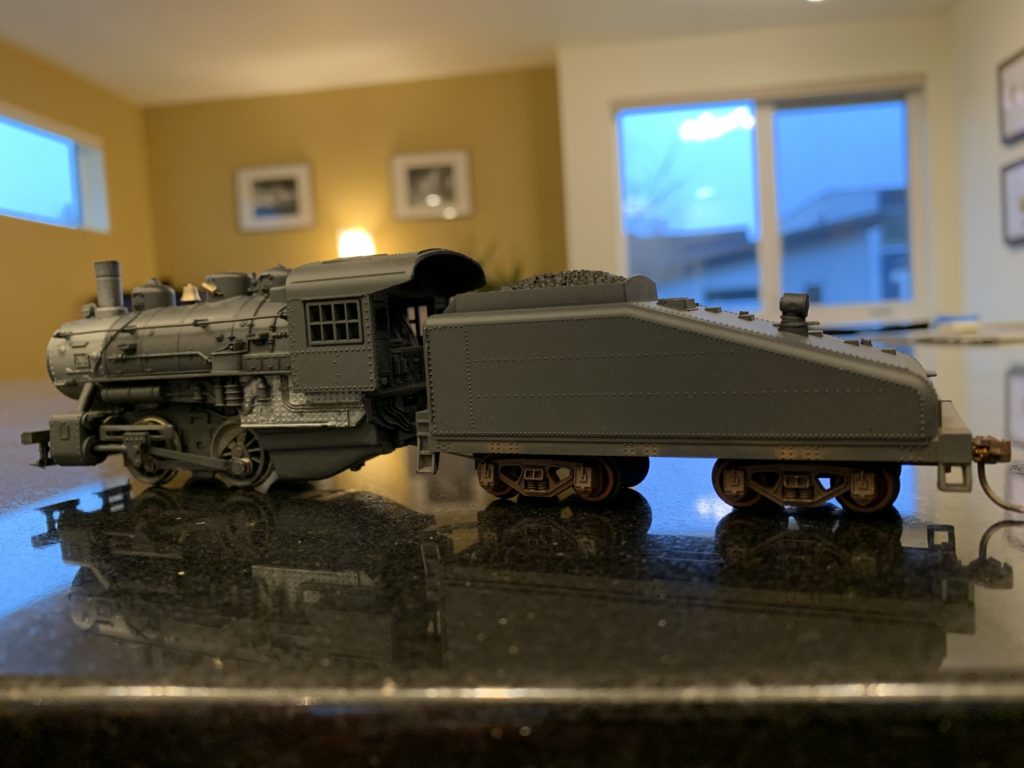
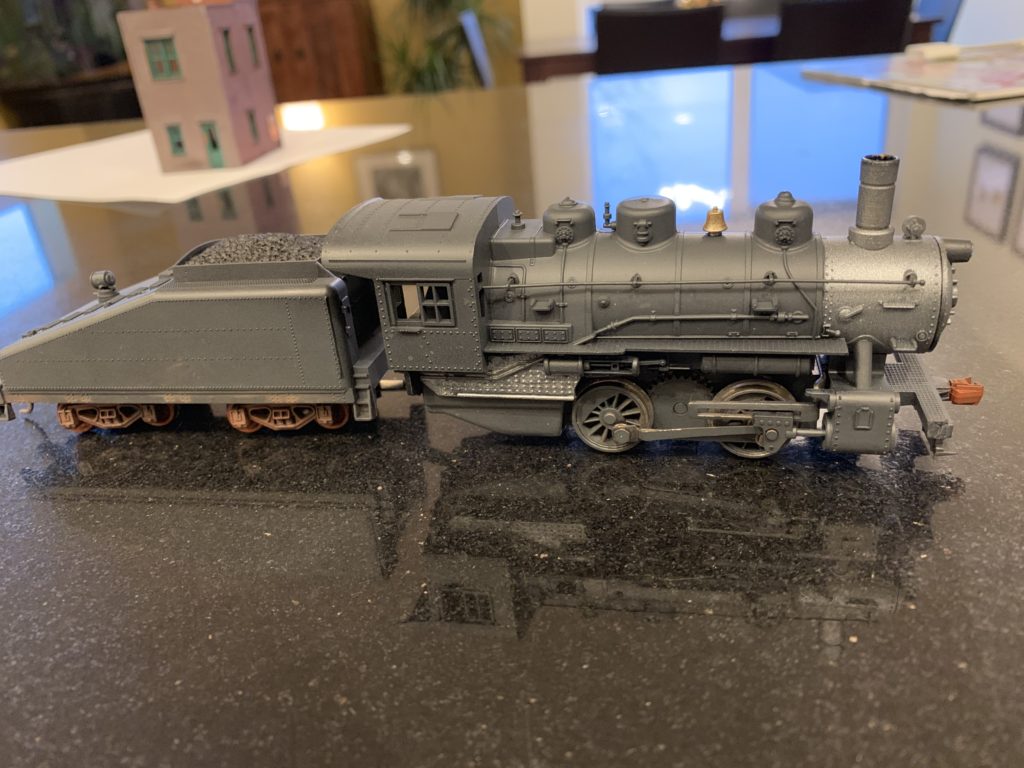
The painting process got underway in late January once I obtained the last thing I needed: a new airbrush compressor. Wearing latex gloves to contain skin oils, I washed the shells under warm water with some dish detergent to remove any residue or oils from prior handling, that could interfere with paint adhesion. Once they were fully dry, I gave the shells a base coat of Model Master Acrylic Flat Grimy Black. I was surprised by how grey grimy black is, but I think it’ll look right once it’s toned down with additional weathering. Once that was dry, I reassembled the model and applied grimy black to the wheels and running gear, while power was applied to keep the wheels moving and apply paint evenly.
I then painted the smokebox and firebox Model Master Acrylic Steel. There are some pipes and other equipment molded into the firebox, so I carefully painted them Model Master Acrylic Flat Black using a 10-0 sable brush. I used the same brush and some Model Master Acrylic Flat Gold to paint the bell and whistle, which really helped them stand out and look more realistic. The last details I painted before coming to a stopping point were the (fake) pilot coupler and the tender trucks, which I painted with Model Master Acrylic Flat Rust, then applied some rust-colored powdered artist chalk. The rust color is a bit too bright on the pilot coupler, so I will tone it down when I get back to this project.
At that point I realized I’d need to apply new decals before I could go much further with weathering effects, so I cleaned stray paint off of the locomotive’s contacts, made sure it still ran well, and put it back in the box for a while.
A couple of weeks later, I ordered a set of Microscale Baltimore and Ohio steam engine decals from eBay. Based on the documentation that came with the decals, I get the impression that these may not be the appropriate decals for such a small tender, but the smallest lettering in the pack looks like it will fit nicely. There are enough decals of various sizes in the pack that I can also use them on the Mantua Pacifics I’m overhauling and the Life-Like Pacific that I recently converted to DCC and will eventually be weathered.