January Progress

Sun Jan 12: Completed the painting of four figures. I began a spreadsheet to keep track of all of the figures I’m painting, including descriptions of the figures, a list of paint colors used on each one, and a name assigned to each one, since, after spending an hour or two painting a figure, I start to think of them as characters.

Sat Jan 18 Puyallup train show: Picked up a PanPastel Rust & Earth Weathering Kit, plus separate PanPastels in black, white and two shades of gray. As I was browsing the products, I told the vendor I had been using regular artist pastels that I grind off with a hobby knife, and asked if the PanPastels adhere to plastic better than regular pastels. He said he thinks they use a “proprietary” formula that helps it adhere, possibly containing CA. I spent about $40 on the kit, which contained some applicator tools, and the four grays. Later, I realized I was thinking of Bragdon weathering powders, which I had heard contain some form of CA.

Sun Jan 19: Completed painting of two figures (bald black dude and fat seated woman).

Mon Jan 20 (MLK Day): began prepping …

Continue Reading →

TV Light Effect

After seeing Bruce Kingsley’s Arduino-animated HO scale house in the April 2016 issue of Model Railroader, which includes a flickering TV screen in a dark room as one of its many effects, I decided to try writing my own TV-flickering code for the Arduino, and ended up with what I think is a slightly more realistic effect. Using a cool-white LED to simulate the glow of a black and white TV, the code creates the effect by changing the brightness to various levels at various time intervals, within preset ranges, in two different ways.

The majority of the flickers are sudden changes from one level of brightness to another, simulating the light effect of moving images and cutting from one camera to another. The length of time between changes varies each time from between 400-1,000 milliseconds (.4 seconds to 1 second). The levels of brightness are randomly chosen each time, from a range of 25-75, on a scale where 0 is off, and 255 is the brightest level possible.

The flicker effect alone, however, looks a little more like the light of an endlessly flickering flame than the light of a television broadcast. For more realism, I needed to include …

Continue Reading →

Building and Painting My First Structure Kit in 30 Years

At the Great Train Show in Puyallup last weekend, I picked up two small DPM kits for $15 each: Pam’s Pet Shop and Kelly’s Saloon. They’re both fairly small, two-story structures. I immediately started working on building and painting the pet shop kit, which I think I’ll make a cafe or restaurant out of.

As with most situations involving a user manual or instruction sheets, I first read the entire instructions, and then re-read parts of it more than once, to fully understand the manufacturer’s intentions before doing anything. But I modified the assembly procedure slightly, based on tips I’ve read in Model Railroader. For example, the instructions say to assemble and glue the entire model before painting, and it didn’t mention using a primer, but I followed MR’s advice by using a primer made for plastic (Montana Plastic Primer, as recommended by a clerk at my local Blick Art Supplies), and I airbrushed the window frames before gluing them to the walls. As I write this, the windows still aren’t attached (more on that later).

Again following advice from Kalmbach’s Basic Painting & Weathering for Model Railroaders, I painted the exterior walls a base …

Continue Reading →

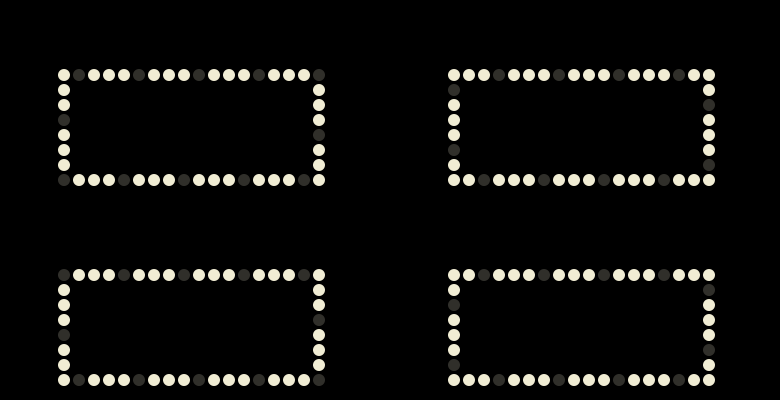
Cinema Marquee

One feature that I’ve wanted to build for a model railroad is a theater or cinema with a lighted marquee outlined in chase lights. Specifically, the “moving hole” type of chase lights, where only one channel is off at a time, while the others normally remain lit, making it appear that groups of lights are chasing with small gaps between them, as opposed to several single lights chasing with big gaps between them. A four-channel circuit might be sufficient, but it would be worth experimenting with up to ten channels.

The first circuit I’ll test for this type of marquee is found in Figure 10 on this post at Nuts & Volts. My intention is to use this circuit to illuminate a series of four to ten LEDs somewhere behind the scenes. The marquee would be outfitted with fiber optic strands inserted into drilled holes from behind, outlining the sign. In a four-channel marquee, for example, every fourth fiber optic strand would be attached to one of the four LEDs, creating the same chase effect as shown in the animation above, while using just four LEDs instead of one for each point of light on the sign.

The other …

Continue Reading →